
scormPROXY QUICK GUIDE
Welcome to this quick guide to trying out scormPROXY!
Next, we will take a tour of the tool to upload content, create a connector (SCORM dispatcher), register a client, and grant licenses. Finally, we will launch the content remotely from an external LMS.
- 1
- 2
- 3
- 4
- 5
- 6
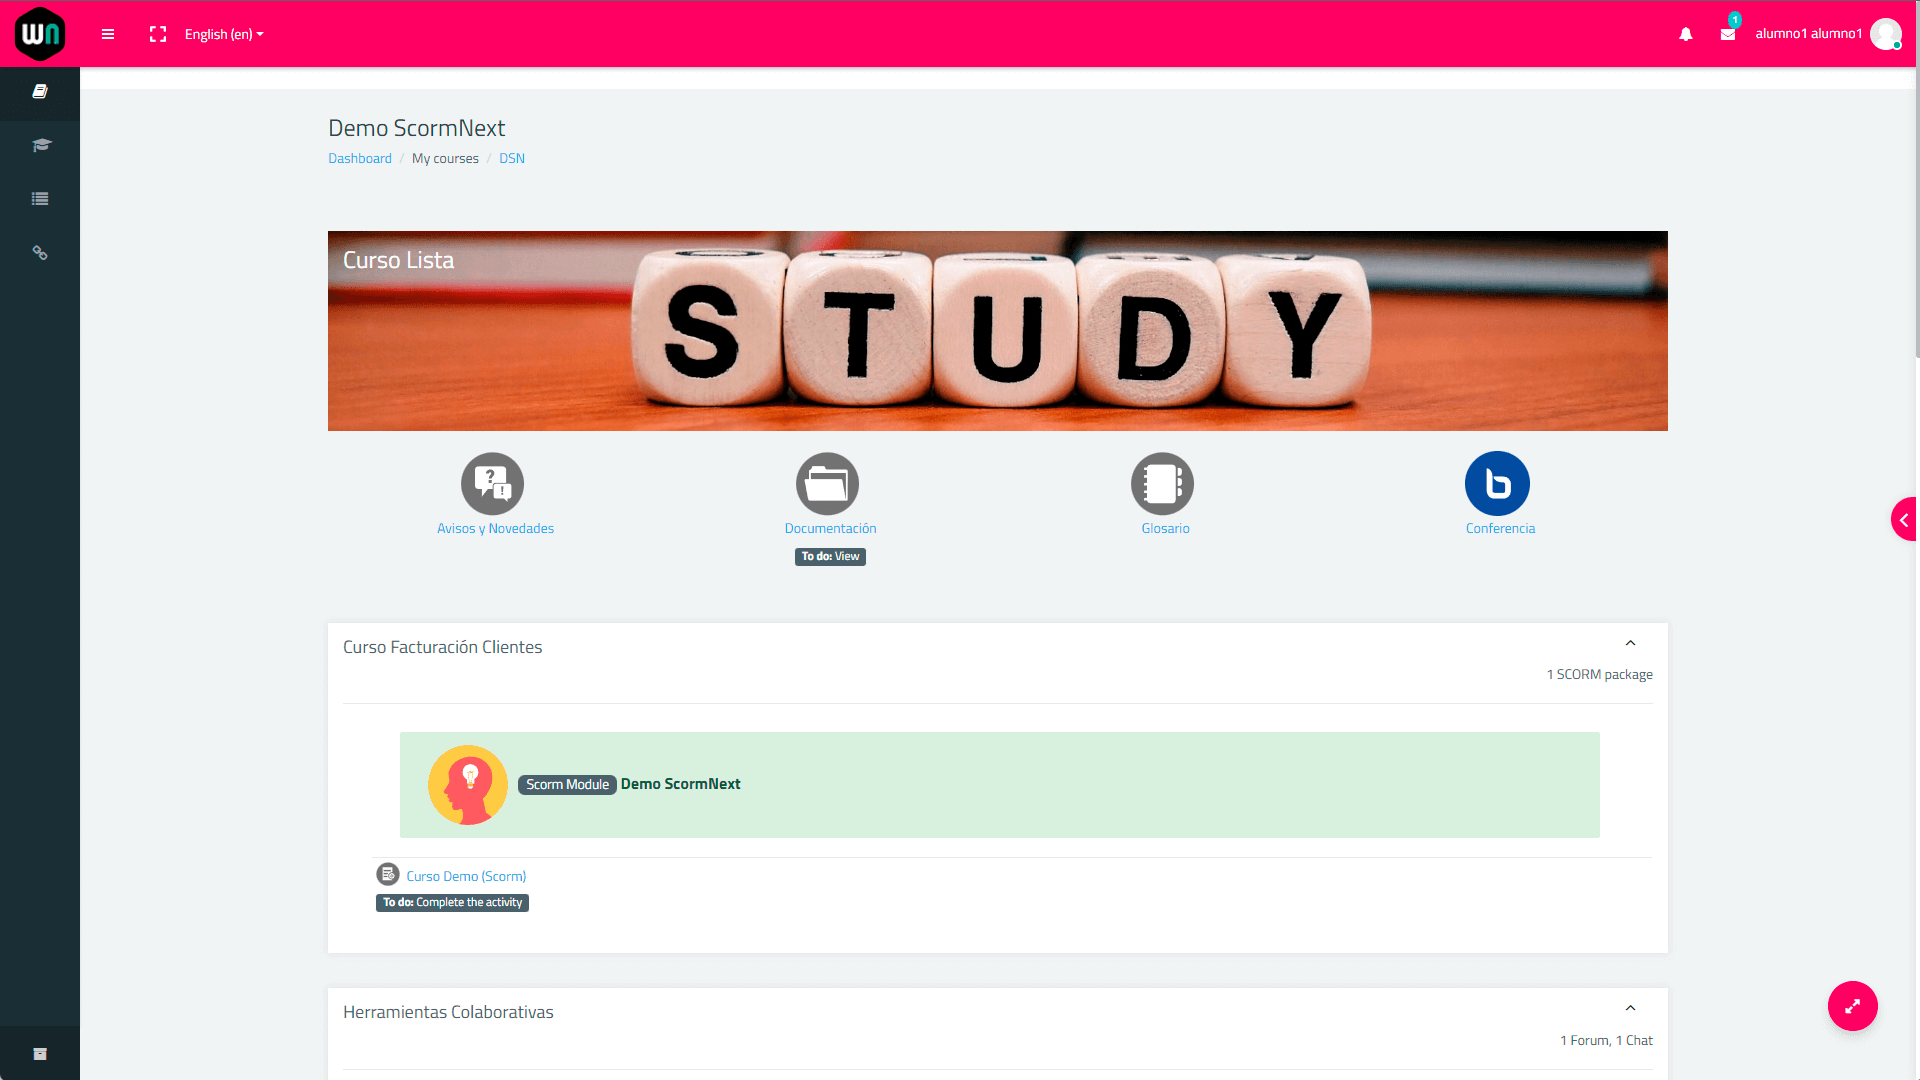
STEP 1: UPLOAD CONTENTS
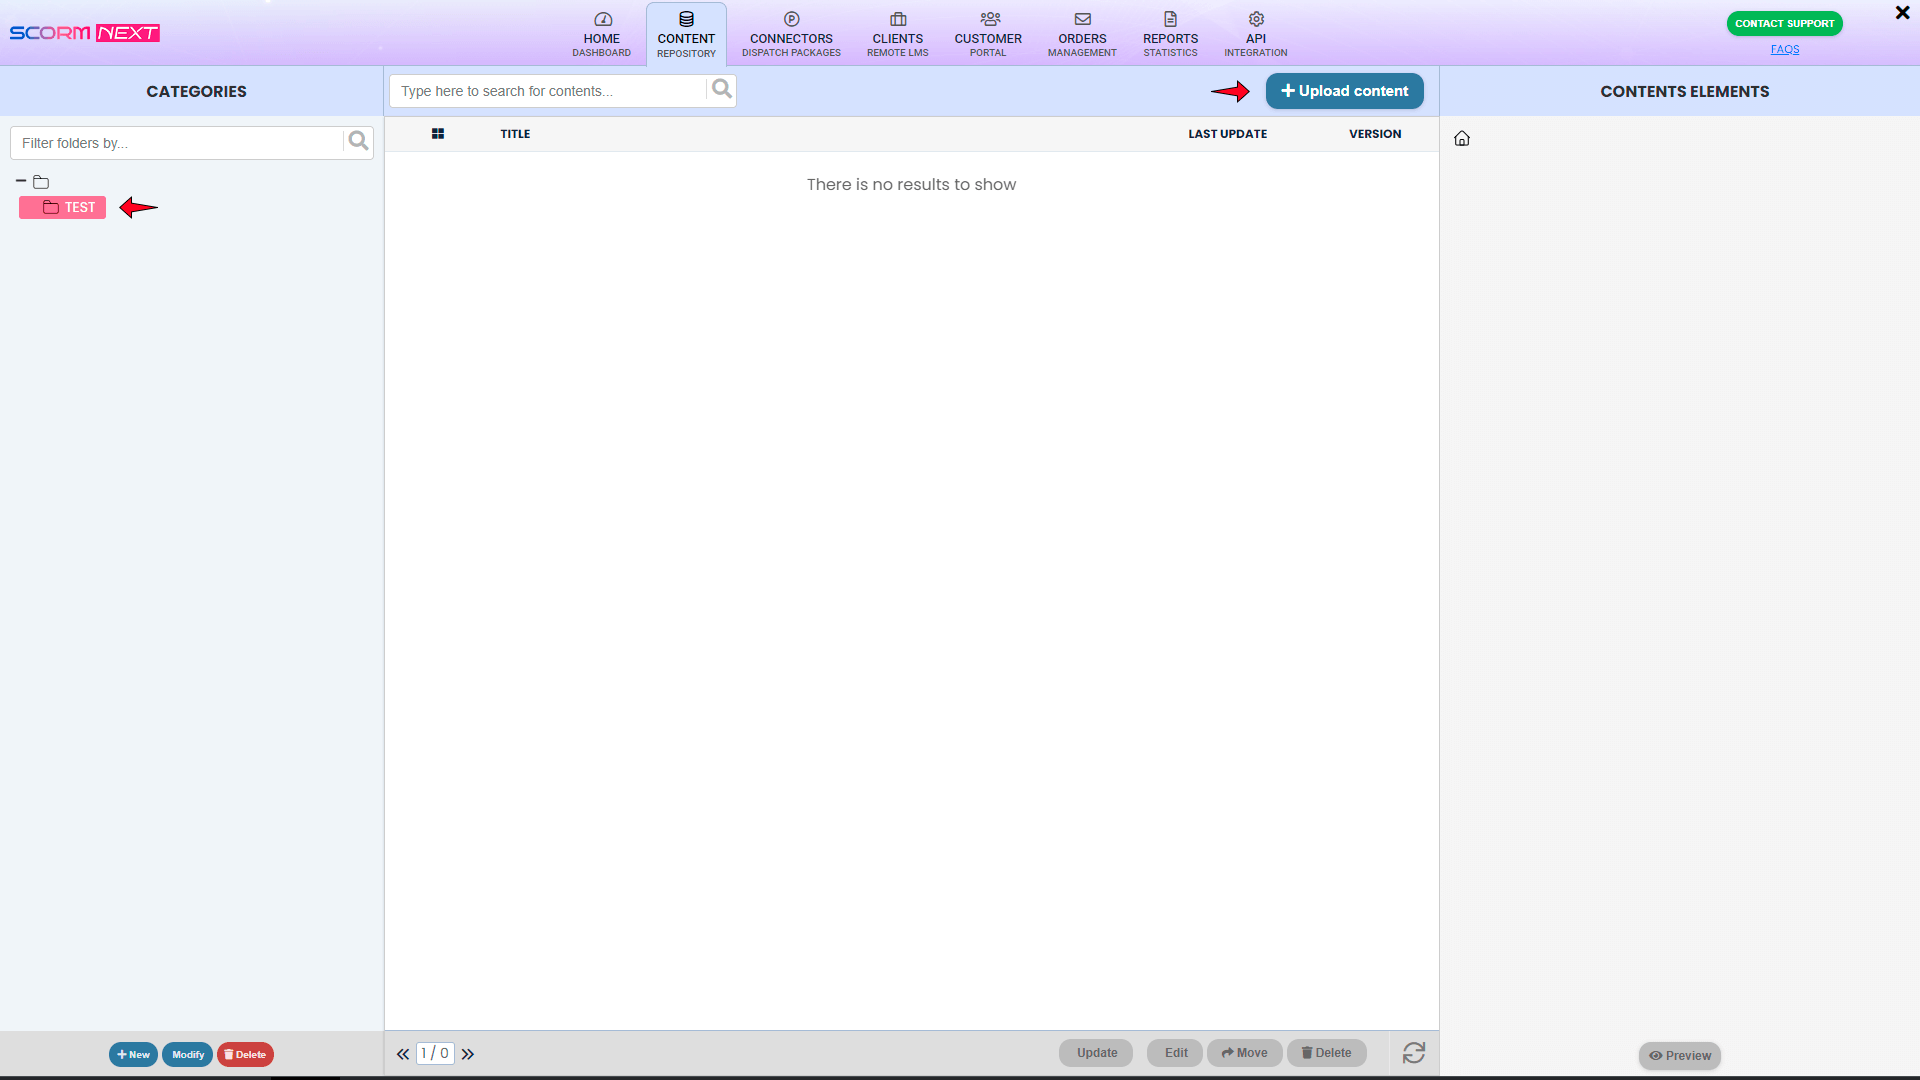
The first step is to upload your contents to the scormPROXY repository. To do this, access the “Content repository” section of the main menu.
If we press the “Upload Content” button, a wizard will guide us through the process.
We chose to create a new folder because we didn’t create any folder yet. Then we enter the name for the new folder.
Now we press the “Continue” button. In the dialog box that opens, we can upload SCORM 1.2, SCORM 2004, and x-API packages, as well as MP4 videos, MP3 audios and PDF documents.

We click on the “Select file” button and we chose the file we want to upload.
Once the file is selected, click “Upload file” and wait…
At this point, we can continue uploading more content or continue with the next step, which will be to create the remote dispatchers for these contents.
STEP 2: CREATE DISPATCH PACKAGES (CONNECTORS)
In the “Connectors” section, we can create the remote dispatch packages of our contents to distribute them to multiple external LMS.

We press the “New connector” button to let the wizard guide us through the process.
We choose to create a new folder because we didn’t create any folder yet for our connector. Then we enter the name for the new folder.
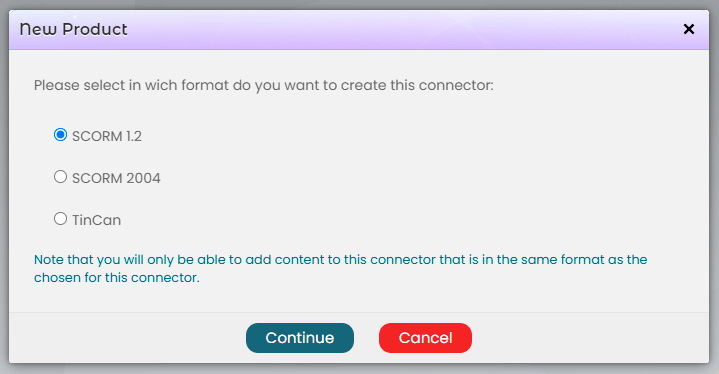
Now we press the “Continue” button. In the dialog that appears, we must choose in which format we want to create the connector. Here we must select the same format as our contents. For example, if we have uploaded SCORM 1.2 content and we want to include it in a connector, we must choose to create an SCORM 1.2 connector.
Once the format has been chosen, we must fill in the internal code or reference for this dispatch package, the title of the product, and optionally its description. We can also specify the number of training hours and the price of this product. This information will then be used in the Customer Portal.
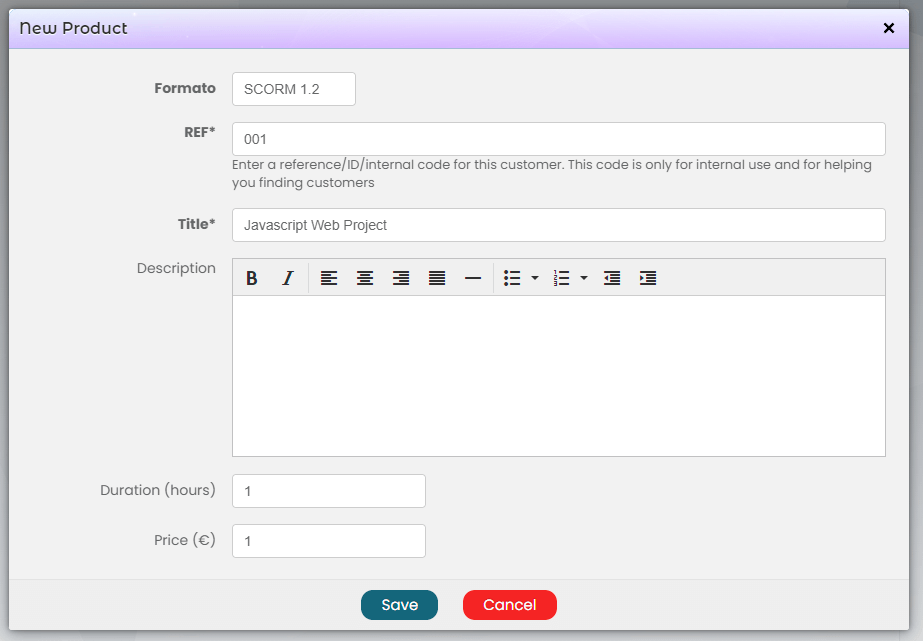
By pressing the “Save” button, we will automatically access the Control Panel of this dispatch package that we have just created.
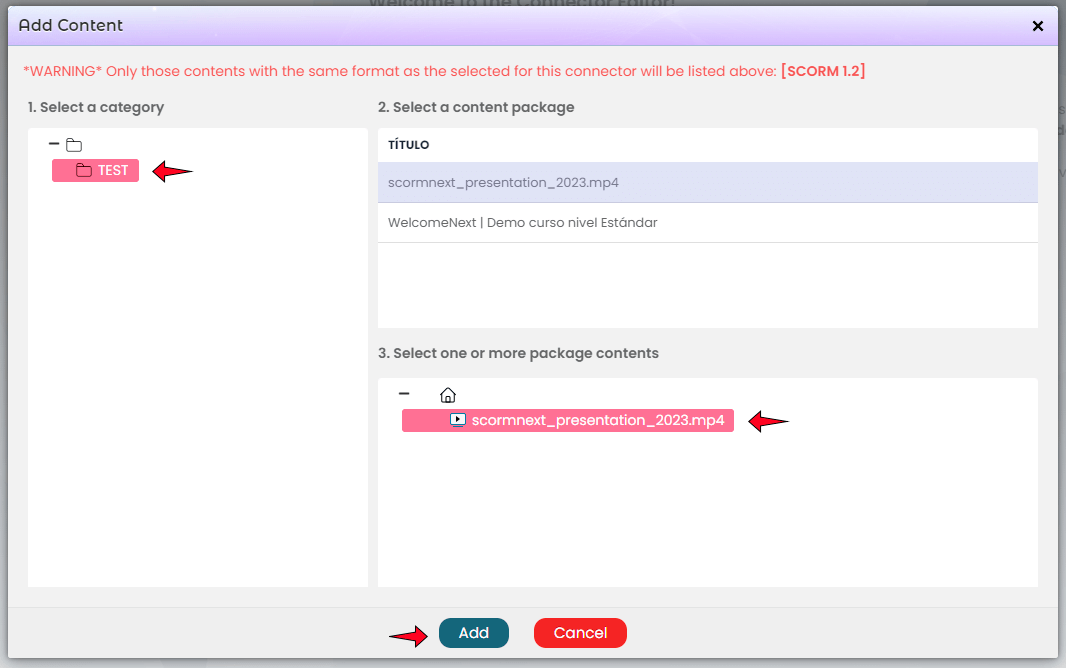
In this section, we must define the contents that will be part of this SCORM dispatcher.

In the right panel, we select, for example, the MP4 video and in the lower right we select the video element.
In the right panel, we select, for example, the MP4 video and in the lower right we select the video element.
Finally, press the “Add” button, and we will see our first content in the connector.
We press the “Add content” button to continue adding content, and in this case, we select the SCORM content and the particular element (SCO) of that SCORM content.
Now that we have configured the content of our connector, press the “Exit edit mode” button to finish editing the connector.
STEP 3: REGISTER NEW CUSTOMERS
To grant access to external LMS to our content, we must register those LMS in the “Clients” section.

Click the “New client” button. In the form that appears, we need to provide the reference or internal code of the client, their name, and optionally, a description.
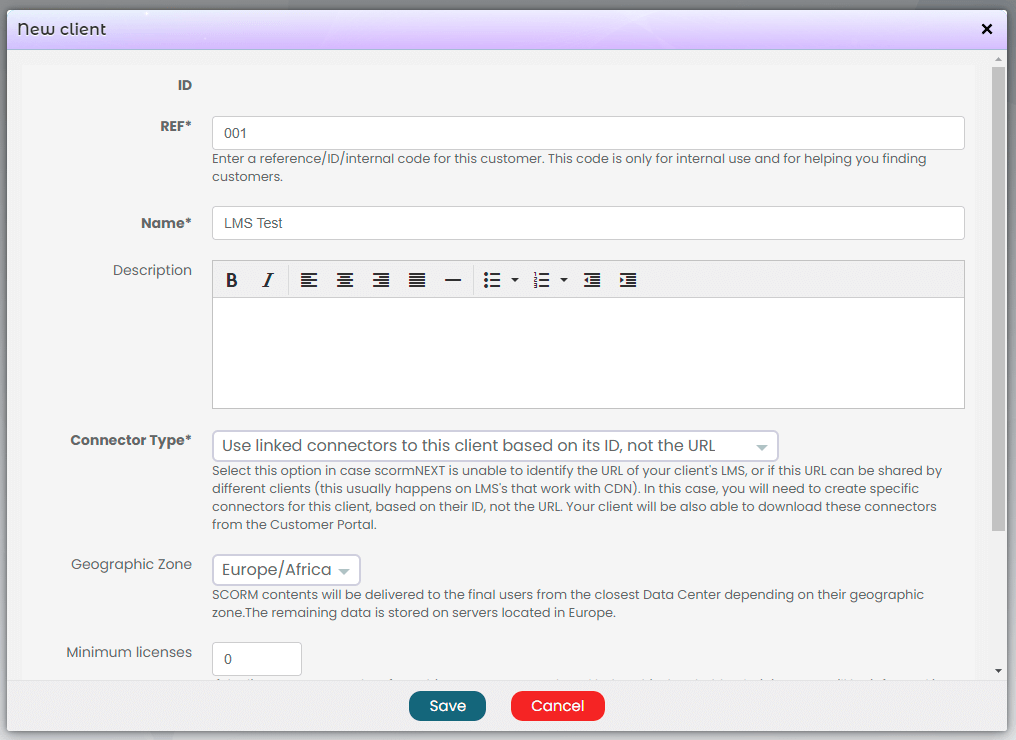
Next, we must decide whether to use generic connectors or connectors specific to this client. Generic connectors are based on the URL of the client’s LMS and are the easiest option as they can be shared with multiple clients.
If we know the URL where the client’s LMS is located, we should select the “Use generic connectors” option and enter the most generic part of the URL in the “Origin” field, for example, “campus.welcomenext.com”.
If it’s not possible to know the URL of the remote LMS or the URL can’t be used to distinguish it from other clients (for example, Corner-stone), we must choose the “Use linked connectors” option. In this case, we don’t need to fill in any URLs for this client.
Finally, in the “Geographical Zone” dropdown, we can select the area in which our client is located to serve the content from the nearest location.
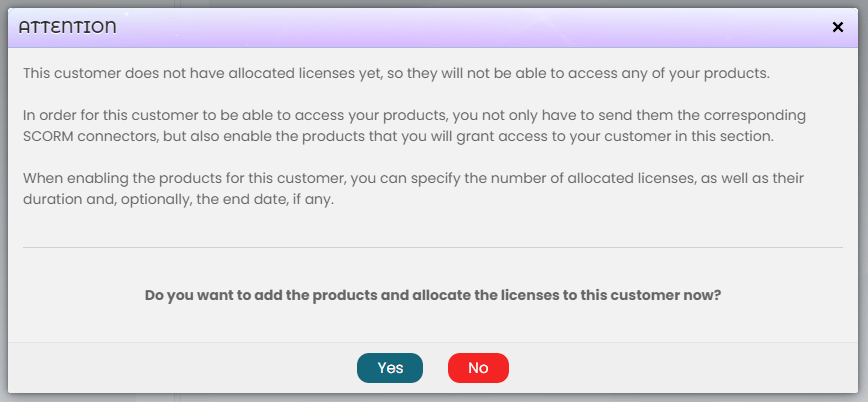
Click the “Save” button and the new client is added to the list. Now, A wizard will then indicate that this client does not yet have allocated licenses.
STEP 4: ASSIGN LICENSES TO CLIENTS
We click on the “Yes” button to continue.
In the dialog box that appears, we can see our folder structure in the “Connectors” section, where we have all our connectors organized.
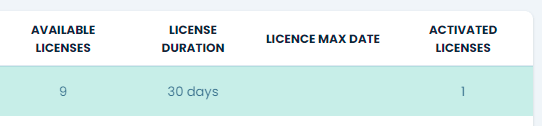
We select the folder and locate the product we created in a previous step. We mark the product and we enter the number of licenses we want to allocate for this customer in the selected product or products. We must also specify the duration of the licenses and, optionally, we can specify a deadline from which no user will be able to access the selected product or products.
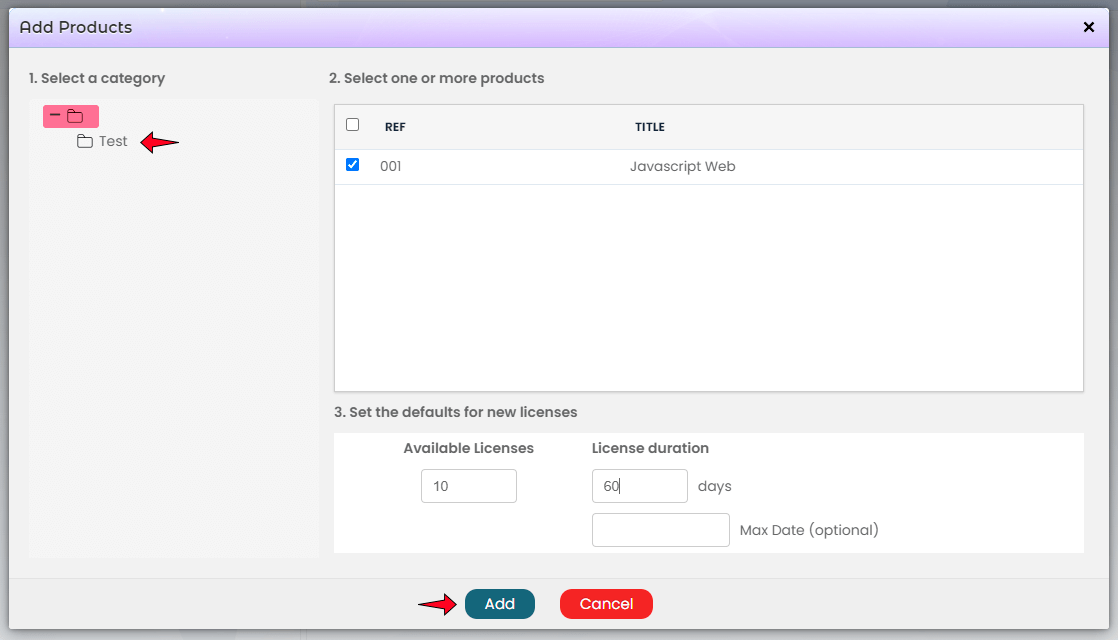
By pressing the “Add” button, we can verify that this client already has access to the connector (dispatch package) we created earlier and that it has the specified number of licenses.

STEP 5: DOWNLOAD DISPATCH PACKAGES (CONNECTORS)
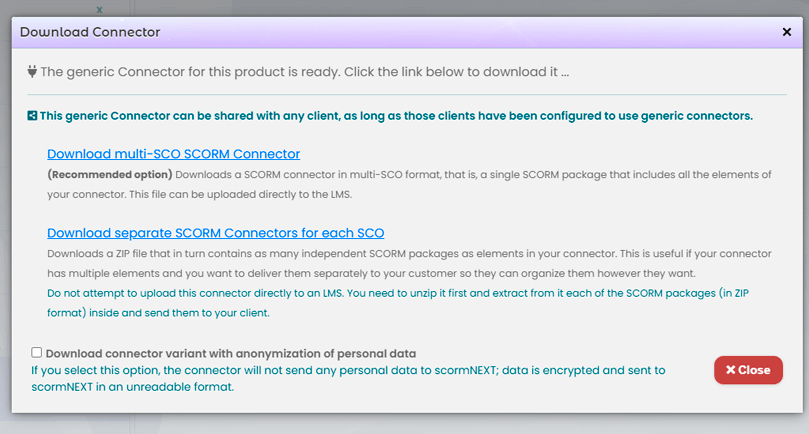
We just have to download the connector for this product and this client.
In the license list, we select the product we have just added and we press the “Download Connector” button.

In the panel that appears, we can download the connector in several formats (multi S-C-O, separate files, or with data anonymization).
In our case, we will download the connector in multi S-C-O format.
STEP 6: SEND DIPATCH PACKAGES (CONNECTORS) TO CLIENTS
The next step is to upload this dispatch package to a SCORM-compliant LMS, such as Moodle.
To do this, it is essential to use a different browser (or an incognito tab) than the one being used with scormPROXY; otherwise, we will lose the session in scormPROXY when accessing the content from the remote LMS.
Once we have accessed the LMS as administrators, we create or update a course and upload our newly downloaded SCORM dispatch package to it.
Next, we go to the course and access the first element of the dispatch package that we have just uploaded.
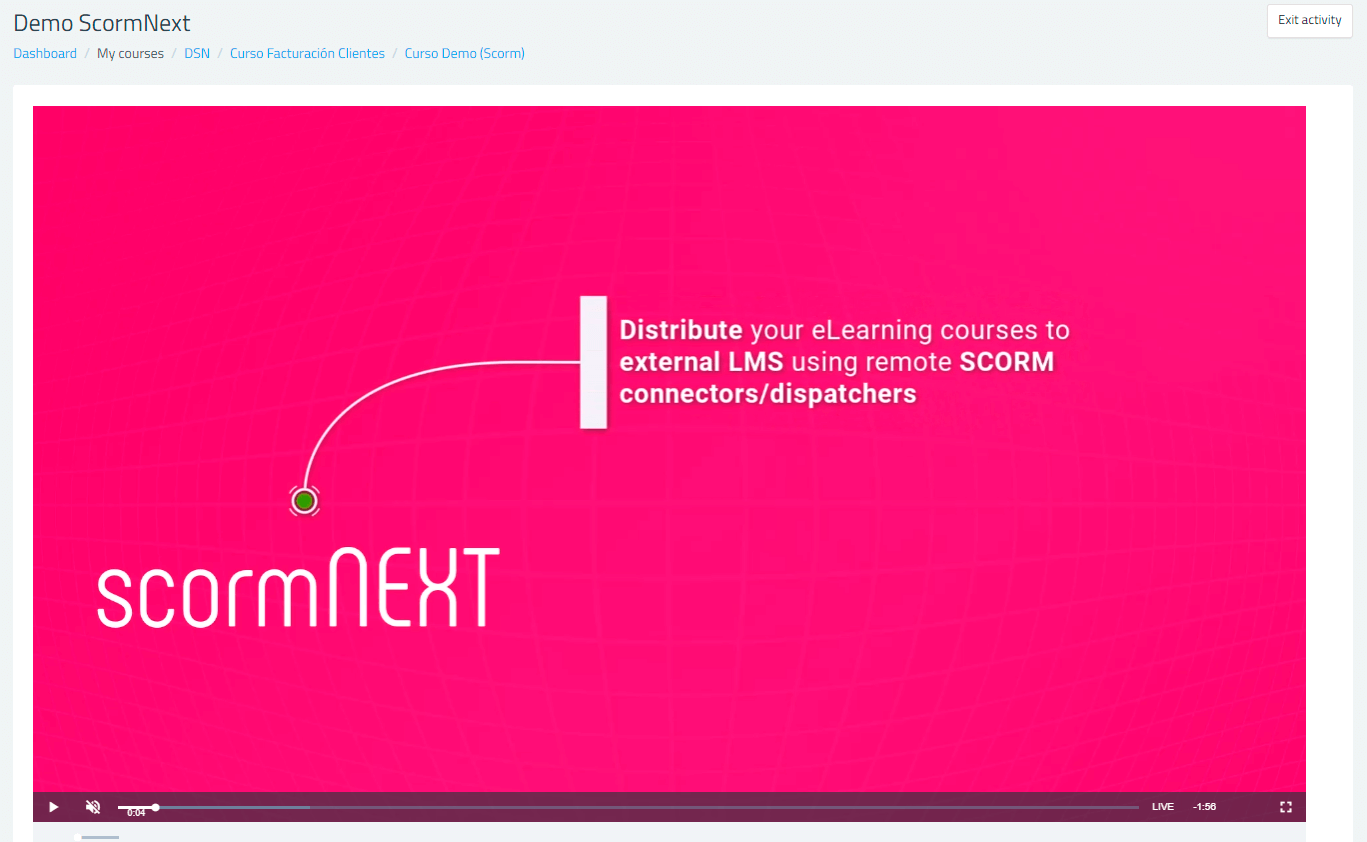
We can see how the content is displayed directly from the LMS in a completely transparent way for the user.
Now we return to the browser where we are working with scormPROXY and press the “Reload” button located at the bottom right of the screen to update the list.
Here, we can observe how a license has been consumed, and the number of available licenses has been reduced in the same way.
Discover our scorm-cloud solution
Take a quick tour of scormPROXY. In this video you will discover how:
> To upload your SCORM content to the cloud
> To create your SCORM dispatch packages (connectors): courses, training pills, etc
>To register the LMS of your remote clients
> To send SCORM dispatch packages and set up licences for each client
> To view SCORM content remotely in an external LMS